Printing photos using ncat
I recently discovered this somewhat known and neat trick on linux where you can print any document without having to install proprietary printer drivers, CUPS or whatsoever - just by using ncat.
This is possible due to the fact that many networked printers expose the port 9100 which is used for raw TCP/IP printing also known as JetDirect or “raw” printing. This printing method works by opening a TCP socket connection to the port 9100 and streaming a print-ready file like a pdf or jpeg directly to the printer input buffer.
Here is how you can try it:
- Install nmap
sudo pacman -S nmap
- Find your printer ip address and check for port 9100
nmap -sn 192.168.1.0/24
- Run the following command:
ncat <printer_ip> 9100 < file.pdf
You can even print plain text (using the default printer font)
echo "hello printer!" | ncat <printer_ip> 9100
Turns out despite the ongoing trend towards unreasonably resource-heavy software, you can still find efficiency where it matters.
So, after surviving yet another technological culture shock, I started to wonder what results this method would yield for photo printing. I checked the photo paper dimensions and quality my HP OfficeJet 4650 (EU model) supports, then immediately went to a local store and grabbed some no-brand A6 photo paper for 3 EUR just to experiment.
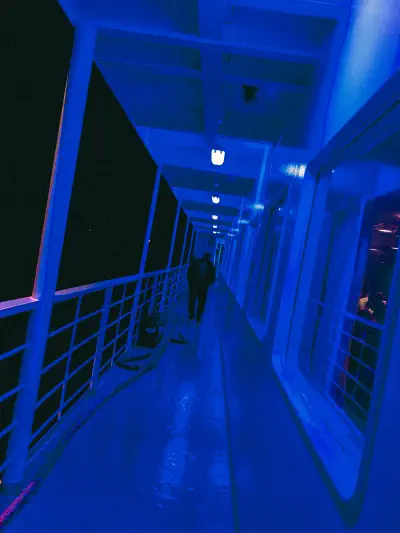
So here is the photo I decided to test print:
Because of the fact that by using this printing we are essentially just sending raw bytes to the printer without providing specific printing instructins about the paper quality and size, it is necessary to somewhat prepare the file yourself. So in my case, I had to calculate the pixel density I wanted to print based on the size of the photo paper, crop the image to completely fill the available frame (avoid white space) and convert to jpeg if the file is not already a jpeg.
The process went as follows:
- convert to jpeg and crop image file to photo paper dimensions using imagick
convert photo.jpg -resize 1181x1772^ -gravity center -extent 1181x1772 -density 300 -units PixelsPerInch photo_preview.jpg
- print using
nc <printer_ip> 9100 < print_preview.jpg
The printed image looks stunning! Almost like a professional print.
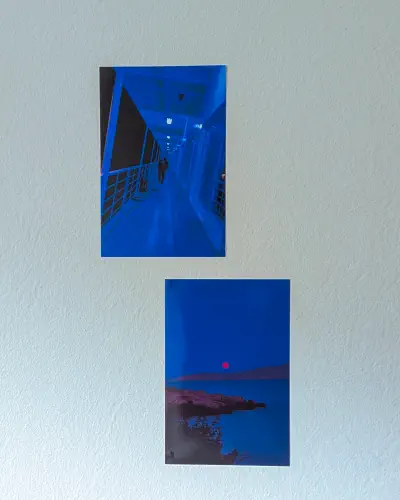
I suppose it’s because printing using this way doesn’t use any ink preservation/optimization method and therefore the printer is always doing its best(?) For comparison, I also tried to print the same photo using CUPS (+ appropriate settings for the paper quality) and the result was weirdly unexpected:
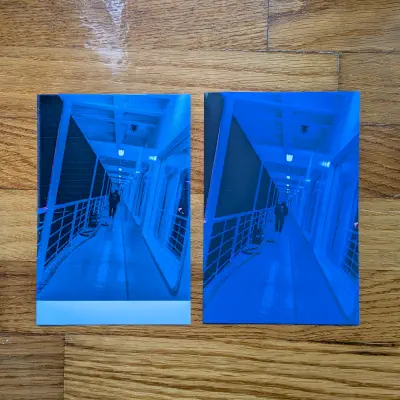
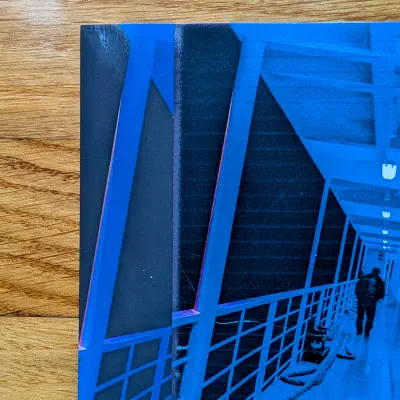
The first thing that I noticed is that the image is straight up more exposed than the original file. Second thing I noticed are those weird printing line artifacts which honestly I wasnt able to figure out what was causing those to appear. And lastly the image is printed with the wrong crop/fit which could be a mistake from my side but unfortunately I wasn’t able to find the original command that I used to make this print.
So, for now, as far as printing goes I’m sticking with the ncat method.
Further reading: